My Kindle's wifi does not work, how do we fix this?
Sid
8
years ago
I have a 2nd Gen Kindle where some of the QWERTY keys do not work, neither does the right-hand "next" key. What parts do I need to fix this?
Sid
8
years ago
I have a 2nd Gen Kindle where some of the QWERTY keys do not work, neither does the right-hand "next" key. What parts do I need to fix this?
David
9
years ago
Hurray Jeremy & Mark! Got it on my 4th try too! It's that ribbon cable for the display (widest of the four). Keep applying firm but gentle pressure with very, very slight side-to-side motion. After about 30-45 seconds of this, the ribbon slid in until the white line was even with the connector. Got her Kindle 2 working again and she loves it!
Reuben
10
years ago
found the video very helpful except it did not show how to remove or re-install the screen, which was my reason for taking the unit apart. Thanks to this forum, I got through it so far. Fingers crossed.
Powerbook Medic
10
years ago
@brad - that is typically the battery, but could also be the motherboard.
brad
10
years ago
I can't get mine to turn on
Jeremy
10
years ago
Look, I never comment on these things, but after 12 (YES 12) tries, the trick was to do just like Mark Simpson said - ATTACH THE CABLE BEFORE REPLACING THE STEEL TRAY!! I let out an audible gasp when the cable finally seated all the way - the white line had been lined up with the text on the Mboard below, but when it finally seated right it went ALL THE WAY to the flipped down connector. Maybe a hair worth of space, but really - it goes in farther than you think it does. And the only way I got enough leverage and the right angle was to do it with the screen and motherboard laid out *next* to each other. Then, once it seats, flip the latch, then fold the screen over into the tray on the other side and replace the steel frame. Go from there. Thanks!
Josh
10
years ago
@mmt Thanks for the report back, that darn screen ribbon just did not want to seat.
@Powerbook Medic, thanks for the new(used) screen and tutorial! If only I found this place before I bought a new one. :P
Alison
10
years ago
The USB charging port on mine is broken. Can I replace just that or do I have to replace the whole mother board?
Adrian
10
years ago
Sandra's comment is invaluable - I should have read it before putting the cover back on.
sandra ward
11
years ago
after 4 reseats on the cables finally up and running boy those things are tricky the first 3 I thought I had them in but it took a 4th. thanks guys
mmt
11
years ago
lessons learned; the replacement screen does not have either the top or botton metal cover with it. You must reuse both metal covers with the new screen. I initially forgot the top metal cover; it had stuck to the old display. You should place the new screen after installation into the old front cover and motherboard on a piece of bubblewrap to keep from putting pressure on the new screen while putting screws back on the motherboard rear cover. The video is OK on dissassembly, but is silent on screen replacement gotchas.
mmt
11
years ago
screen replacement successful after display ribbon connector jiggled into the motherboard connector. When placed in the motherboard connector there is a white line on the ribbon about 2mm out. This must be jiggled back and forth while applying slight forward force on the stiff part of the ribbon cable until the white line is even with the motherboard connector.
mmt
11
years ago
please describe the cable placement technique for the display into the motherboard. Is forward movement, not just lie flat, required.
Powerbook Medic
11
years ago
@mmt - Kindles have static displays. That message being on there just means the kindle it was removed from had a drained battery when it was disassembled. If you are unsure of the installation, we do offer a repair service.
mmt
11
years ago
does this placement require forward movement into the connector other than lie flat? The display arrived from your depot with the same critical battery comment it has now.
Powerbook Medic
11
years ago
@mmt - the cable should go in far enough to cover the contacts on the end of the cable.
mmt
11
years ago
Please answer the display connector question.
Powerbook Medic
11
years ago
@mmt - that warning is typically an issue with the battery, so if you haven't tried a replacement battery, you may want to. If you do the power switch reset for 30 seconds and the screen goes blank and comes back on, the display is usually working properly.
mmt
11
years ago
The replacement screen says critical battery, recharge. I did to green charge light, but the display stays the same. I tried all reset techniques and the display stays the same. It is like the connector is not made to the motherboard, so the motherboard says no display. the cable from the display was placed in the botherboard connector and the locking bar lowered. Is it possible that the display cable has to be forced into the motherboard connector? I tried moderate force but count not get it to move into the motherboard connector. So the basic question is does the cable lie and lock or must be forced into the connector?
Darushka
11
years ago
So glad I read your comment Mark! I used your trick and it worked like a charm. I agree with Heidi, a video showing how to put it back together would be nice.
Powerbook Medic
11
years ago
@Deborah - make sure you try using a wall adapter to charge it up. Connecting it through USB on a computer can be problematic.
Powerbook Medic
11
years ago
@John - the kindle screens will stay on the last thing they were on even after being powered down. You most likely have a battery issue.
Deborah Daugherty
11
years ago
I have a problem with the battery not staying charge. It doesn't seem to want to charge while the power cord is plugged in. I have replaced the battery once and the new one lasted one week, still doesn't want to hold a charge, with power cord plugged in?
John
11
years ago
I tried replacing a screen, but I could never get the replacement screen I ordered to work. The replacement screen was stuck on "Critical Battery" display, even when disconnected. My old damaged screen was always blank, and i reconnected it with no problem; there's only a small crack in a corner. Could the replacement screen I ordered be bad?
Powerbook Medic
11
years ago
@Mike - they may have gotten out of alignment inside. Hard to say without opening it up.
Mike B.
11
years ago
The home back and the next page button above it dont work but operatr the same as they always have. Any suggestions?
Heidi
11
years ago
Thanks so much Mark Simpson. I was having the same problem and you helped me figure out what was wrong! I wish they had a video of putting it back together. Sure would make things easier.
Mark Simpson
11
years ago
I got it on my 4th try. As I suspected, the ribbon cable for the display is tricky to get all the way in. The trick is to attach the ribbon cable first, before placing the screen in its steel tray. That give you the room to manipulate the cable all the way into the plug so the white line is right at the edge of the plastic retainer.
Mark Simpson
11
years ago
I replaced the screen by following the video but don't seem to be getting power to the new screen. Is there a trick to reconnecting the screen cable? It just sort of sits on the contacts until you snap down the little plastic retainer and the white line on the cable is around 1/16" away from the plastic retainer. Anything else that could be wrong?
Powerbook Medic
11
years ago
@Kevin - it could be either. I'd say the motherboard is less likely the cause. For the battery, I wouldn't bother replacing it unless you are only getting half a charge or less.
Kevin L.
11
years ago
The Kindle is not responding to commands from the directional button. Is that a switch issue or a motherboard issue? What would I need ro buy? Is it worth replacing the battery while its open?
Powerbook Medic
11
years ago
@Smergb - yes.
Smergb
11
years ago
The directional switch is broken on my kindle, would i have to order the front frame to get a replacement?
Powerbook Medic
11
years ago
@Carrie - yes it is. Sorry looks like we put the battery model number in the title.
Carrie
11
years ago
Is this the same take-apart for the DOO701?
Thaddy
11
years ago
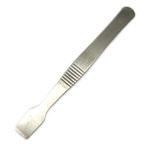
I disagree with that putty knife comment. If you are looking to just remove the display, you need to pry off the thin metal bezel surrounding and holding the display to the motherboard. To do this, find the little dots/divots on the side of the bezel and carefully pry/bend the bezel from each divot point.
Powerbook Medic
11
years ago
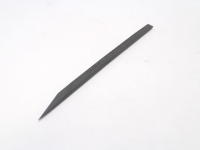
@Kim - the video shows everything except removing the display from the motherboard. For that, you need a very thin tool like a putty knife and just slowly go in between the LCD panel and motherboard until you loosen all of the adhesive.
Kim Theis
11
years ago
Hi Guys.
I took it all apart. Barely...but I got it. Only to find out, there is more to do! Nobody mentioned a metal frame connected to the motherboard which houses the display. How does that come apart and go back together? This is a bit upsetting.
Powerbook Medic
12
years ago
@Barbara - you should be able to. If not, you can send it to us to repair it.
Barbara
12
years ago
OK, now I know how to take it apart, but will I be able to fix the broken toggle switch?
Comments
Heather
Sid
Sid
David
Reuben
Powerbook Medic
brad
Jeremy
Josh
Alison
Adrian
sandra ward
mmt
mmt
mmt
Powerbook Medic
mmt
Powerbook Medic
mmt
Powerbook Medic
mmt
Darushka
Powerbook Medic
Powerbook Medic
Deborah Daugherty
John
Powerbook Medic
Mike B.
Heidi
Mark Simpson
Mark Simpson
Powerbook Medic
Kevin L.
Powerbook Medic
Smergb
Powerbook Medic
Carrie
Thaddy
Powerbook Medic
Kim Theis
Powerbook Medic
Barbara